使用 Bullet 进行碰撞检查

除了灵活的碰撞库 (FCL), Bullet Collision Detection 可用作碰撞检查器。 本教程基于 Visualizing Collisions 教程展示碰撞。
此外,还提供连续碰撞检测(CCD),并通过 Bullet 进行演示。
入门
如果您尚未完成,请确保您已完成 Getting Started.
运行代码
Roslaunch 启动文件以直接从 moveit_tutorials 运行代码::
roslaunch moveit_tutorials bullet_collision_checker_tutorial.launch
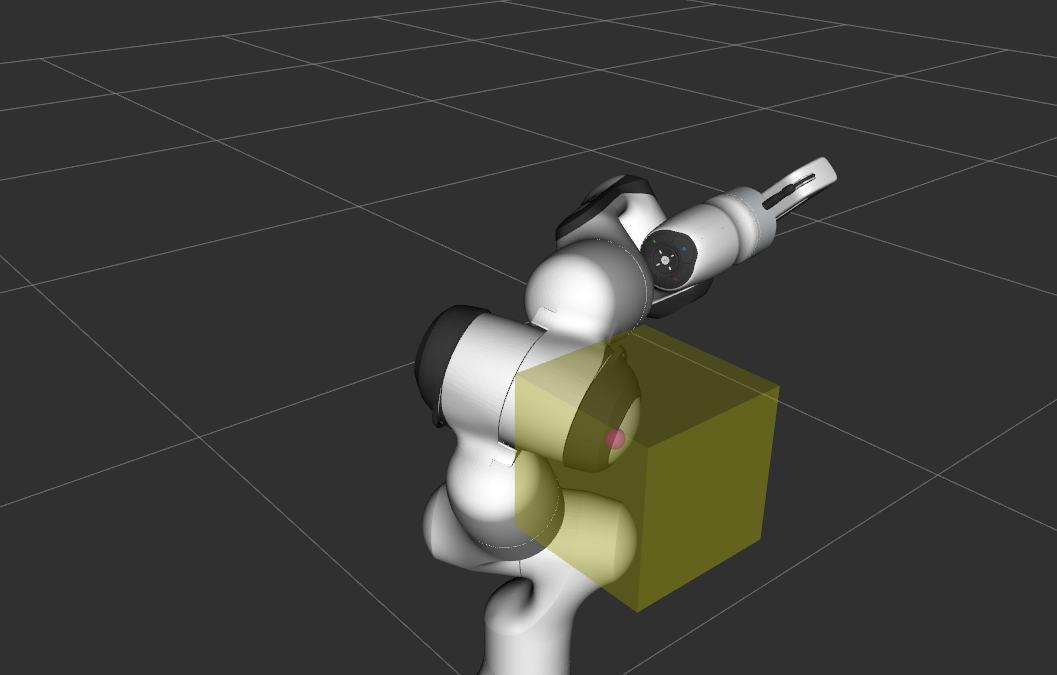
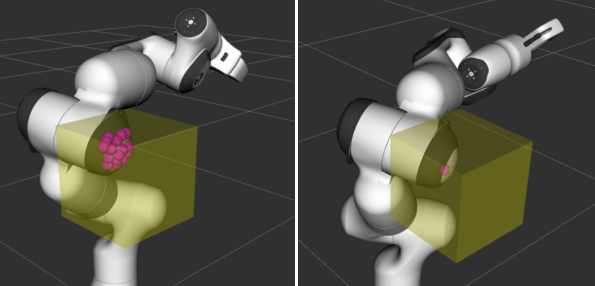
您现在应该看到 Panda 机器人和一个带有可拖动交互式标记的盒子。请注意,与 FCL 不同,Bullet 不会计算形状的所有单个接触点,而只会计算最深穿透点。

Left: FCL collision results. Right: Bullet collision results.
请注意,Bullet 作为碰撞检测器的当前实现不是线程安全的,因为内部碰撞管理器是可变成员。
连续碰撞检测
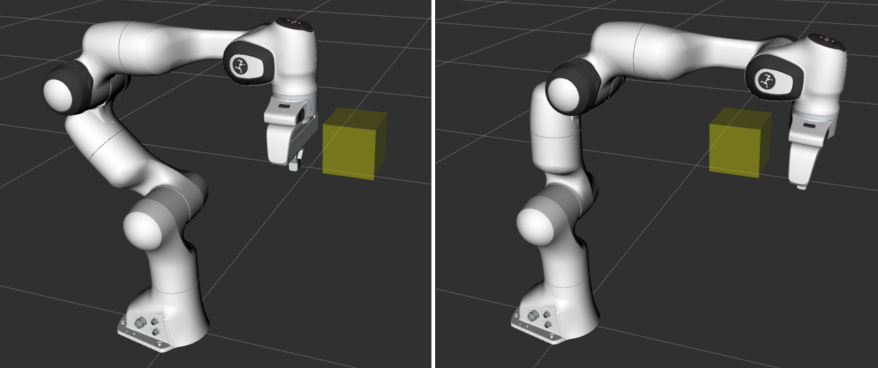
此外,Bullet 具有连续碰撞能力。这意味着可以保证在两个离散机器人状态与环境之间的过渡期间不会发生碰撞。要获得 CCD 的演示,请单击 RViz 左下角“moveit_visual_tools”面板的“下一步”按钮。交互式机器人消失,机器人出现在其手就在箱子后面的状态。再次按下下一步时,机器人跳转到手就在箱子前面的配置。在这两种状态下,均未检测到碰撞(参见终端输出)。

Left: robot in configuration 1. Right: robot in configuration 2.
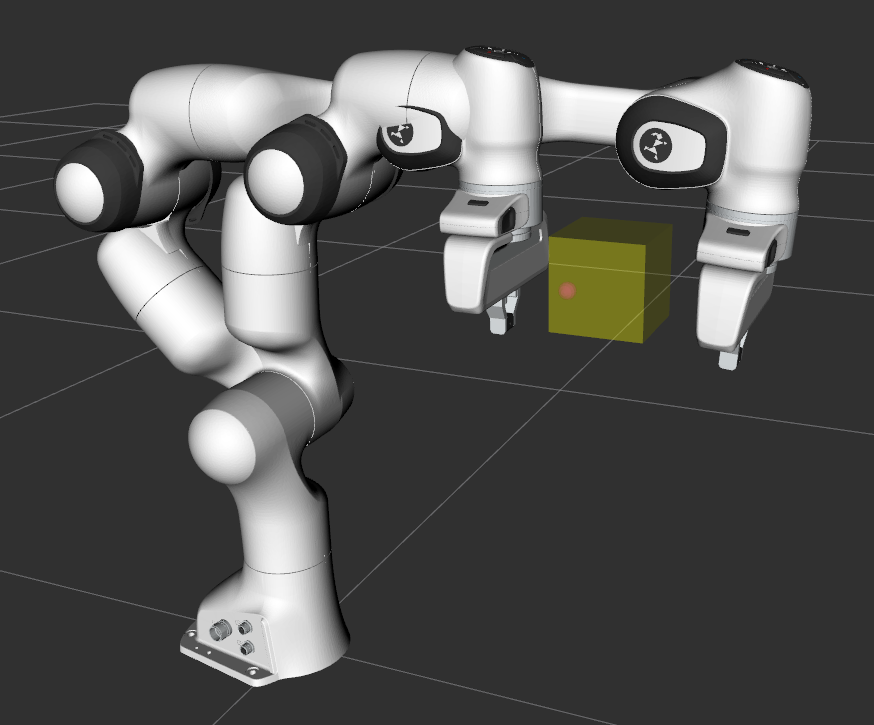
在接下来的“下一步”中,使用两个离散姿势之间的铸造机器人模型执行 CCD。报告碰撞 (详情请参阅终端输出)。

再次按“下一步”即可完成教程。
相关代码
完整代码可见 here 在 moveit_tutorials GitHub 项目中。为了使本教程专注于 Bullet,省略了很多理解此演示如何工作所需的信息。请参阅 Visualizing Collisions 有关碰撞可视化的代码解释。
The code starts with creating an interactive robot and a new planning scene.
InteractiveRobot interactive_robot("robot_description", "bullet_collision_tutorial/interactive_robot_state");
g_planning_scene = std::make_unique<planning_scene::PlanningScene>(interactive_robot.robotModel());
Changing the collision detector to Bullet
The active collision detector is set from the planning scene using the specific collision detector allocator for Bullet.
g_planning_scene->setActiveCollisionDetector(collision_detection::CollisionDetectorAllocatorBullet::create());
For understanding the interactive interactive_robot, please refer to the Visualizing Collisions tutorial.
Running Continuous Collision Checks
For the CCD demonstration, the Panda robot is loaded again and with it a new planning scene created. Bullet is again set as the active collision detector.
robot_model::RobotModelPtr robot_model = moveit::core::loadTestingRobotModel("panda");
auto planning_scene = std::make_shared<planning_scene::PlanningScene>(robot_model);
planning_scene->setActiveCollisionDetector(collision_detection::CollisionDetectorAllocatorBullet::create());
The box is added and the robot brought into its position.
Eigen::Isometry3d box_pose{ Eigen::Isometry3d::Identity() };
box_pose.translation().x() = 0.43;
box_pose.translation().y() = 0;
box_pose.translation().z() = 0.55;

auto box = std::make_shared<shapes::Box>(BOX_SIZE, BOX_SIZE, BOX_SIZE);
planning_scene->getWorldNonConst()->addToObject("box", box, box_pose);

robot_state::RobotState& state = planning_scene->getCurrentStateNonConst();
state.setToDefaultValues();

double joint2 = -0.785;
double joint4 = -2.356;
double joint6 = 1.571;
double joint7 = 0.785;
state.setJointPositions("panda_joint2", &joint2);
state.setJointPositions("panda_joint4", &joint4);
state.setJointPositions("panda_joint6", &joint6);
state.setJointPositions("panda_joint7", &joint7);
state.update();

robot_state::RobotState state_before(state);
Finally, a collision check is performed and the result printed to the terminal.
collision_detection::CollisionResult res;
collision_detection::CollisionRequest req;
req.contacts = true;
planning_scene->checkCollision(req, res);
ROS_INFO_STREAM_NAMED("bullet_tutorial", (res.collision ? "In collision." : "Not in collision."));
This code is repeated for the second robot configuration. For the CCD check, we display both robot states at the same time.
moveit_msgs::DisplayRobotState msg_state_before;
robot_state::robotStateToRobotStateMsg(state_before, msg_state_before.state);
robot_state_publisher_2.publish(msg_state_before);
Now a continuous collision check using the two different robot states can be performed. As the planning scene does not yet contain any direct functions to do CCD, we have to access the collision environment and perform the check.
res.clear();
planning_scene->getCollisionEnv()->checkRobotCollision(req, res, state, state_before);
ROS_INFO_STREAM_NAMED("bullet_tutorial", (res.collision ? "In collision." : "Not in collision."));
Note that the terminal output displays “In collision.”.
启动文件
整个启动文件是 here 在 GitHub 上。本教程中的所有代码都可以从“moveit_tutorials”包中编译和运行。